|
Ozark Green Thumb BCMG Monthly e-Newsletter |
|
|
|
JANUARY GARDEN CHECKLIST
For more information contact Mark D. Keaton County Extension Agent Extension office at 425-2335.
0 Comments
 Crowd-pleasing white bean chili calls for canned beans and chicken broth, making prep convenient. Yield: 8 servings (serving size: about 1 cup) Cook: 20 minutes Ingredients
Preparation
Source: Cooking Light November 2006
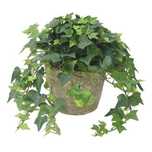 With lobed leaves and lush, trailing vines, English Ivy is a beautiful accent plant. It blends beautifully in a dish garden, adding texture to a variety of tropical plants. Ivy is a vigorous grower with strong, wiry stems densely covered with distinctive foliage. Although commonly grown as a hanging plant indoors, its aerial roots can easily be trained to climb a moss stick or trellis. There are hundreds of types of ivy varieties -- some with plain green leaves, others are variegated with yellow, gold or creamy white. Green Thumb Tip Keep this plant away from heat vents, which will dry out its leaves. Ivy thrives with moist air and soil.
Tips for Growing English Ivy House Plants
Origin: Europe
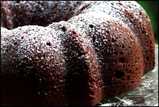 This cake is easy to make and makes a lovely desert when served with a nice cup of rich coffee. Oven: 350 degrees Bake: 60 minutes Ingredients:
Instructions:
 You have put your garden at rest for the winter. Now it's time to check out all the seed catalogs and plan your spring garden.
Excerpt from Old Farmers Almanac
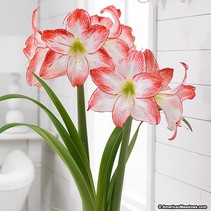 Amaryllis (Hippeastrum species) are popular for their 6 to 10 inch trumpet shaped flowers that are born on 1 to 2 foot stalks (scapes). Although red and scarlet are the most popular colors, the flowers may be pink, white, salmon, apricot, rose, bicolor or picotee (petals with a different edge color) and in both single and double forms. Because they can produce flowers in mid-winter, they are prized for the color they add to indoor landscapes. Amaryllis may be purchased as bulbs or plants, in or near bloom. Blooming plants are often given and received as gifts. Amaryllis plants should be kept out of direct sunlight while they are in flower to prolong the life of the flowers. Selecting and planting bulbs When growing amaryllis from bulbs, careful selection of the bulbs is important because the plant's performance is influenced by both the size and condition of the bulb. It is best to select the largest bulbs available as they will produce more stalks and blooms the first year. The bulbs should be firm and dry with no signs of mold, decay or injury. Select a container that is deep enough to allow adequate room for good root development and has provisions for drainage. The diameter of the pot should be about ONE inch larger than that of the bulb. Although this may seem small, amarylis bulbs prefer a smaller container. Select a potting medium that has a high organic matter, but drains well. The bulb should be positioned so that at least one-third, preferably one-half, of the bulb is above the surface of the potting medium. Firm the potting medium around the bulb, water it thoroughly and place the container in a warm, sunny spot. Do not fertilize the bulb until it begins to grow. After growth appears, it is essential to fertilize the plants regularly with a fertilizer that has high phosphorus content. Move the plant out of direct sunlight when the flower buds have begun to show color. After-flowering care The secret to successfully growing amaryllis is to keep the plants actively growing after they have finished blooming. After the flowers have faded, cut them off to prevent seed formation. Do not remove the flower stalk until it has turned yellow; it will help manufacture food that will be stored in the bulb. If the bulb does not produce a flowering stalk the next blooming period, it has not stored enough nutrients during the post-blooming period. It is important that amaryllis receive plenty of bright sunlight after they have finished blooming so place it in the brightest possible location indoors. Water the plant from the top of the container thoroughly whenever the top 2 inches of the soil is dry to the touch. Empty any excess water that drains from the pot as wet soil will promote root and bulb rot. Continue to fertilize the plant regularly. When all danger of frost is past, acclimate the plant to the outdoors by first placing it in shade or indirect light. Gradually move it to a bright garden or bed where it will receive full sun for at least 6 hours daily. Sink the pot into the soil and fertilize with a balanced houseplant fertilizer monthly to build up nutrients for flower production the next year. Amaryllis plants should be brought indoors before the first frost in the fall. Amaryllis do not require a resting period and will bloom if kept evergreen. However, blooming time can be controlled by allowing the bulb to go through a resting period. After bringing the potted plants indoors, store them in a dark place like a basement or cool closet (above freezing) and do not water. Do not remove the foliage until it has become dry and shriveled. The bulbs can be forced into bloom again after resting for 8 to 12 weeks. Inspect the bulbs periodically and bring them into light if new growth appears. If no new growth appears, they can be forced to bloom by bringing them into bright light and watering the soil thoroughly. Usually one or more flower stalks appear first, but occasionally they are preceded by leaves. Flowers usually develop in about 4-6 weeks from dormant bulbs, so they can be timed to flower at Christmas or for Valentine's Day. Amaryllis plants bloom best when they are potbound so they will require repotting only every 3 or 4 years. The best time to repot them is after they have gone through a dormant period, and you are bringing them up from the basement to reflower. Follow the same potting procedure as with a newly purchased bulb. Pests and disease Although there are several insects, mites and disease organisms that may attack amaryllis plants under greenhouse conditions, they are not as prevalent on amaryllis grown in homes. Careful inspection when purchasing bulbs accompanied by proper watering and good sanitation practices will prevent most insect infestations as well as the development of diseases. The narcissus bulb fly (Merodon spp.) may lay its eggs in the bulbs of amaryllis plants that are placed outdoors for the summer. The maggot larvae begin to feed in the outer scales of the bulb and eventually work their way into the interior of the bulb. The foliage of infested plants may become wilted, yellow and distorted and the plant will eventually die. The exterior of the bulb may appear normal, but will reveal rotting tissue when pressed. Because control is difficult, it is best to destroy any infested bulbs as soon as the pest is identified. Use of insecticides is generally ineffective. Red blotch (Stagonospora curtissi) is a fungus disease that may affect both the appearance and the health of amaryllis plants. Red spots or blotches that develop into elongated cankers with red borders may develop on the base of the flower stalks and emerging leaves. The disease is often difficult to diagnose because small red or pink patches may appear on the outside of healthy bulbs. These marks should, however, be superficial with the fleshy layers beneath white and free of markings of any kind. Although the leaves may become distorted and the flower stalks may break easily making the plants unsightly, the disease is usually not fatal to the plant. Careful inspection of bulbs and the use of sterile potting mixtures will serve as preventative measures. If the disease persists even with good cultural and sanitation practices, the bulbs can be treated with a systemic fungicide. Amaryllis require some care and attention throughout the year, but those beautiful trumpet shaped flowers are a great reward in the long months of winter. Source: Carl Hoffman
Mary Meyer University of Minnesota Extension 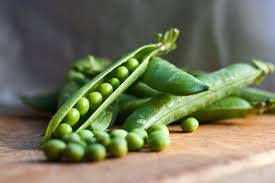 Peas are everyone's garden favorite. There's nothing like the taste of fresh sweet peas in spring. Here's some history and tips on planting peas. A Brief History of Peas: Northerners and southerners have different ideas about the meaning of the word "pea." To southerners, peas are black-eyeds, crowders and creams; to northerners, these same varieties are known as shell beans. The northern version of "peas" is known as English or green peas, and if you ask home gardeners to name their favorite vegetable, many will say green peas. Garden peas originated in western Asia and Eastern Europe. We know they existed as far back as the Stone Age, because dried pea seeds were discovered among relics in lake villages of Switzerland. Apparently 1,000 years ago the pea, which was small and dark colored, was grown only for its dried seeds. At the turn of the millennium, people started eating them fresh, too. The popularity of peas increased during the 18th century. The Anglo-Saxon word for peas was "pise," later to be called "pease," but nobody knew whether that referred to one pea or many. So, the word "peas" was coined. Because our green garden peas were derived from varieties that thrived in England, they are called "English peas." Planting Peas When you're deciding where to plant which vegetable, there are two good reasons why it's a good idea to locate your peas in a section that receives full sun:
No matter what size your garden, you'll have the best results if you plant peas in 16-inch-wide rows with walkways at least the same width. Not only will you harvest more, but you'll put less time and work into your crop. For most varieties, if you plant in wide rows there's no need to build trellises or fences for support, because the vines hold each other up. Also, wide-row vines form a living- mulch canopy that helps to eliminate weeds and keeps the soil cool and moist. When To Plant Peas Peas are a cool-weather crop that can withstand frost. Northern gardeners can often plant their first crop near the end of March, as soon as the garden has thawed and the soil can be worked. A few varieties, however, are happier being planted when it's warmer and harvested during midsummer. Seed catalogs and packets indicate the preferred time for planting different varieties. In the Far North, garden peas can be harvested almost all summer if you use a little ingenuity. Plant peas every three to four weeks for a continual summer harvest. Once you've harvested your first crop of peas, pull out and compost the vines or till them in and replant a second crop of peas in the same space. Or you can plant another short-season vegetable. In the West, gardeners can harvest peas year-round; in the South they're best if grown in the fall, winter and very early spring before the weather gets too hot. Source: National Garden Association
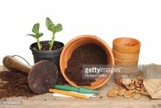 The Importance of Garden Pot Cleaning Soil builds up salt that can damage plants. These salts get deposited on the inside of planters. Any diseases your plants may have had last season can get transferred to your new plants. Clean used flower pots before using them again. Garden pot cleaning only takes a few minutes, but it can keep your plants healthy and productive.  Natural ways to protect your garden & gardening tools with white distilled vinegar:
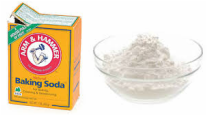 Baking Soda As a Garden Grime Buster: Rub baking soda on wet hands after gardening. Rinse well. To Clean Bird Baths and Clay Pots:
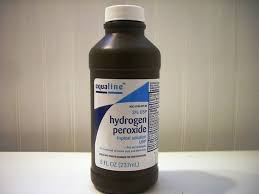
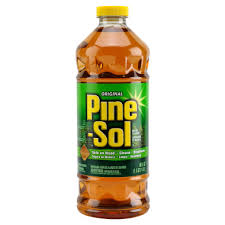
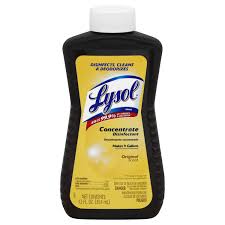
 Cleaning Garden Tools Before disinfection, tools should be free of dirt and debris. Disinfecting solutions should not be allowed to contaminate the soil.  The use of chlorine bleach is not recommended for disinfection use in the field for a variety of reasons:
Other disinfectant treatments have included:
The Bottom Line
|
Archives
April 2022
|
|
