 Latin: Gladiolus x hortulanusGladiolus are too common and mundane to be cool in the garden. The omission of gladiolus from the garden is understandable because its blooms are fleeting - usually lasting for less than a week in any kind of pristine state - and its form is somewhat wanting. Yet, surprisingly, the gladiolus is one of the most important summer "bulb" crops with some production in every state of the Union. Gladiolus plants have been known since ancient times but it was not until the introduction of the African species into European gardens in the 18th and 19th centuries that hybridizers began to create the garden forms we know today. About 250 distinct species of gladiolus are described with about 15 species native in the Mediterranean region. Only the African species have been used in developing modern hybrids. The most notable of the African collectors was James Bowie (1789-1869) who initially collected for Kew Gardens in England, but was let go when the plant collecting budget was halved in 1820. His dismissal may have also reflected the riotous life style he developed while afield in remote parts of the world. Unable to find a governmental sponsor, Bowie returned to South Africa as a private collector where he worked on a consignment basis. The glad’s 15 minutes of fame came early in the 20th century when hybridizers such as Lemoine in France and Luther Burbank in California focused their attention on the plant. In 1910, the American Gladiolus Society was founded to promote the growing of glads and to standardize nomenclature. But the gladiolus craze seems to have subsided by mid century, primarily because gladiolus is just not a tidy garden plant. Another contributing factor to the flower’s decline in popularity was psychological. Florists began using it as a cheap and readily available funeral flower, and only the most intrepid supporter will stay faithful to a flower associated with bereavement. The gladiolus, a member of the iris family, does not produce a true bulb but instead reproduces by means of a corm. If cut in half, a corm is a solid starchy mass with no apparent internal structure such as you find in a true bulb. If the tunic is pulled away and the surface of the corm inspected a series of concentric rings will be found which correspond to the nodes of a typical plant. Each year, the corm is consumed to accomplish the above ground growth of the plant with a new corm formed atop the old one as the plant begins to flower. In addition to the main corm a number of pea-sized cormels will be produced which will attain flowering size in two growing seasons. The vegetable garden is probably the best place to grow gladiolus corms. By making multiple plantings from early to mid April until late July, cut blooms can be enjoyed all season long. If you wish to use the plants in the flower border, plant the corms in clumps of a dozen or so in an area about the size of a dinner plate. A wire support, such as a tomato cage, will be required to keep the plants from toppling, but the spiky four foot tall inflorescence can add some nice vertical lines to the flower border. Single colors are best for this use. Gladiolus can be left in the garden year round in most parts of the state, but hard winters which freeze the soil to the depth of the corm will kill them. Most people that grow gladiolus for cut flowers dig their plants each fall and store the corms in a dry, frost free area over winter. By: Gerald Klingaman, retired Extension Horticulturist - Ornamentals Extension News - July 14, 2000
0 Comments
The following is a garden checklist that gardeners need to be considering for March:
For more information on any of the above points, contact the University of Arkansas Division of Agriculture Cooperative Extension office at 425-2335. 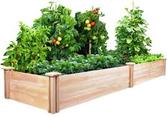 Productive vegetable gardens are based on a strong foundation, and that foundation is the soil. Healthy soil consists of different non living mineral particles such as sand, silt and clay, as well as organic matter and living organisms. Healthy soils provide an environment conductive to root growth which leads to a healthy plant and fruit and and vegetable production. First, start with a soil test in order to know what nutrients are needed as well as the pH and organic content of the soil. Refer to the Smart Gardening tip sheet “Don’t Guess - Soil Test!” for details on how to do a soil test. Once you have the results, you will know what amendments and in what proportion to add for best results in the vegetable garden. Only add the recommended amounts of fertilizer based on the soil test results. Over application of phosphorous and nitrogen fertilizers is a known contaminant of surface and ground water. A collaboration with Organic matter is also a very important component of your soil as it is the “glue” holding all of the soil components together, providing space for oxygen and good drainage. Organic matter includes composted animal manure, chopped up leaves, grass clippings and cover crops. These are added to sandy soils in order to improve water-holding capacity, and added to clay soils to improve drainage. Site preparation If you are breaking ground for a new garden, eliminate grass or weeds that might be in the planned garden area first. One method is to remove the grass or sod by hand. This is most feasible when an instant result is needed. The sod chunks or grass removed can be added to a compost pile and re-entered to the garden system at a later time. However, this method will also require some organic matter be added to the soil below the old turf roots. If you are breaking ground for a new garden, eliminate grass or weeds that might be in the planned garden area first. One method is to remove the grass or sod by hand. This is most feasible when an instant result is needed. The sod chunks or grass removed can be added to a compost pile and re-entered to the garden system at a later time. However, this method will also require some organic matter be added to the soil below the old turf roots. There are several methods that employ a “smothering” technique that will accomplish this task without using chemicals. Laying down a sheet of plastic and securing it with weights around the edges will effectively kill vegetation beneath except for the most stubborn of perennial weeds. Another easy way to smother weeds is to place several sheets of newspaper down in the is to place several sheets of newspaper down in the area and layer compost or other organic matter such as chopped up leaves, grass clippings or mulch over the top. This is commonly called "sheet composting." The organic layers on top will degrade while weeds below are dying out, resulting in a weed-free space. This may take a few months or can effectively start in the fall with spring planting in mind. Today's newsprint is made with vegetable-based ink so there are no worries about residues left behind. No-till farming and gardening is a method in which the soil is left undisturbed except in the planting space for the seeds or plants. For years farmers have utilized the no-till method for crops, realizing the benefits of erosion control, soil moisture conservation, fewer weeds and building soil structure and health. Excessive tillage destroys the soil structure which is the foundation for healthy plant roots that interact with the living component of the soil. Adding organic matter also enhances soil structure by encouraging microorganisms to act as a conduit for nutrients to enter plant roots. The no-till technique leaves crop residue on the soil surface which increases the organic matter content of the soil while enhancing the environment for the living component. Many gardeners are utilizing no-till vegetable gardening. Planning a no-till smart vegetable garden requires a little bit of thought. It is imperative that you don’t walk on the soil in the planting areas as you work in the garden. This will only compact the soil. Therefore, you need to design your garden so that you have paths to walk on between the actual planting areas. The beds should be no more than 4 feet wide so that you can reach across the bed to weed or harvest while kneeling in the walkway. In addition, create beds that are shorter in length so that you are not tempted to cut across the bed to get to another one. A good size bed recommendation is around 4 feet wide by 8 feet long. The sheet composting method mentioned above can be used to prepare the bed the first year. After that, organic Straw mulch used in walkways will reduce compaction and retard weed growth. matter such as compost should be added to these beds each season; organic matter breaks down over time and needs to be replenished. One to 2 inches of compost may be all a garden needs for the season. It may take a couple of seasons to build your no-till beds, but once they are established, adding additional organic matter is all that is necessary. Using an organic mulch such as straw or wood landscape mulch will help prevent weeds from growing and can serve double-duty as organic matter; it’s an important component in the no-till garden. You may want to explore other popular types of no-till systems, including sheet composting, lasagna gardening, straw bale gardens and container gardening. If you choose a more conventional method of preparing the garden such as with a cultivator, you are encouraged to reduce tilling to a minimum. As mentioned before, tilling breaks down soil structure and disturbs the environment that is beneficial to living organisms, so the less tilling, the better. The practice of rotating crops in the garden is also a smart tip. This action helps reduce pests and pathogens that may be carried on the same crop from one year to the next. In addition, crops such as beans and other legumes “fix” nitrogen on their roots which will benefit the next plant that gets planted in that space the following season. By: Pamela J. Bennett and Denise Johnson
Ohio State University Extension  Prep time: 2o minutes Cook time: 5 minutes Makes: 4 servings Ingredients:
Directions:
Source: The Sonoma Diet  Simmer budget-friendly beef stew meats to tender, fall apart perfection using your slow cooker. The trick is to tenderize the beef before cooking then let it stew slowly in the liquid using the gentle heat from your crock-pot. It’s hard to be patient when your home smells so delicious, but trust us, it’s worth the wait. Ingredients
Serves: 4 | Serving Size: 2 cups 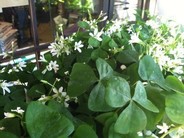 If you’re decorating for a St. Patrick’s Day party, you’ll want to include a potted shamrock plant or several shamrock houseplants. But party or not, the potted shamrock plant is an attractive indoor plant. So what is a shamrock plant? Keep reading to find out more about growing and caring for shamrock plants. The potted shamrock plant (Oxalis regnellii) is a small specimen, often reaching no more than 6 inches. Leaves are in a range of shades and delicate flowers bloom off and on during fall, winter and spring. Leaves are clover shaped and some think the plant brings good luck. These leaves fold up at night and open when light returns. Also known as the lucky shamrock plant, growing Oxalis houseplant is simple and adds a touch of spring to the indoors during winter months. Shamrock houseplants are members of the wood sorrel family of the genus Oxalis. Caring for shamrock plants is simple when you understand their periods of dormancy. Unlike most houseplants, the potted shamrock plant goes dormant in summer. When leaves die back, the potted shamrock plant needs a time of darkness to rest. Caring for shamrock plants during the period of dormancy includes limited watering and withholding of fertilizer. The dormant period when growing oxalis houseplant lasts anywhere from a few weeks to three months, depending on the cultivar and the conditions. New shoots appear when dormancy is broken. At this time, move shamrock houseplants to a sunny window or other area of bright light. Resume caring for shamrock plants to be rewarded with an abundance of the attractive foliage and blooms. When shoots appear in autumn, begin watering the newly growing Oxalis houseplant. Soil should remain lightly moist during times of growth. Water two to three times a month, allowing soil to dry out between waterings. Fertilize after watering with a balanced houseplant food. Shamrock plants grow from tiny bulbs that may be planted in fall or early spring. Most often, shamrock plants are purchased when foliage is growing and sometimes when in flower. Many cultivars of oxalis exist, but exotic varieties provide the best indoor performance. However, don’t dig a wild wood sorrel from outdoors and expect it to grow as a houseplant. Now that you’ve learned what is a shamrock plant and how to care for a growing Oxalis houseplant, include one in your indoor collection for winter blooms and maybe good luck. Source: Becca Badgett
Gardening Know How  Vegetable (Cool Season) - Cabbage Family Brassica oleracea var. capitata Brassicaceae Family This cool-season crop grows best when daytime temperatures are in the 60s F. Direct-seed or transplant spring crops for fresh use in summer. Plant fall crops for winter storage or sauerkraut. How to plant:
Maintenance and care: Sow seeds indoors 6 to 8 weeks before average last spring frost. Keep soil warm (about 75 F) until germination. Then keep plants around 60 F. Provide direct sun so plants don’t get leggy. When plants are 4 to 6 weeks old, transplants into garden 12 to 24 inches apart, in rows 18 to 34 inches apart. Use closer spacings for smaller, early varieties, wider spacings for larger, late-season varieties.Can be direct seeded as soon as you can work the soil. Will germinate at soil temps as low as 40 F. Plant ½ to ¾ inch deep, about 3 inches apart. Thin to final spacings. Direct seed in summer for fall crop, or start transplants in late May and transplant in late June or early July. Plants have shallow root systems. Avoid even shallow cultivation. Mulch to protect roots, reduce weed competition and conserve moisture. Use floating row cover to protect crop from early pests. When heads are mature, they are prone to splitting in response to any stress or a rain following a dry period. Avoid splitting by choosing varieties that resist splitting, spacing plants close together (8 to 12 inches for early varieties, 12 to 16 inches for later varieties), using shovel to sever roots on one side about 6 inches from the plant, or twisting plants after heads have firmed to break some of the roots. To help reduce disease, do not plant cabbage or other cole crops in the same location more than once every three or four years. Pests: Cabbage aphids - A hard stream of water can be used to remove aphids from plants. Wash off with water occasionally as needed early in the day. Check for evidence of natural enemies such as gray-brown or bloated parasitized aphids and the presence of alligator-like larvae of lady beetles and lacewings.Cabbage root maggot - White maggot larvae tunnel in and feed on roots of plants. Damage causes wilting early on, death of plants later on. Cabbageworms - Handpick and destroy. Row covers may be useful on small plantings to help protect plants from early damage. Put in place at planting and remove before temperatures get too hot in midsummer. Flea Beetles - Use row covers to help protect plants from early damage. Put in place at planting and remove before temperatures get too hot in midsummer. Control weeds. Cutworms - Control weeds. Cardboard collars around each plant give good protection. Other pests: Cabbage loopers Slugs Nematodes Diseases: Clubroot - Locate new plants in part of garden different from previous year's location. If soil infested, add lime to raise soil pH to 7.2Purple blotch (Alternaria porri ) - Avoid wetting foliage if possible. Water early in the day so aboveground plant parts dry as quickly as possible. Avoid crowding plants, allowing air circulation. Eliminate weeds around plants and garden area to increase air circulation. Practice plant sanitation. When plants are not wet, remove and destroy affected plant parts. In autumn rake and destroy all fallen or diseased leaves and fruit. Other diseases: Cabbage yellows Black rot Black leg Varieties Browse cabbage varieties at our Vegetable Varieties for Gardeners website.Plant early, midseason and late varieties to spread out harvest. Early varieties tend not to store well. Late varieties tend to be better for storage or for making sauerkraut. Some varieties are resistant to certain diseases and insects. Varieties may vary in head size, shape (round, flat, conical) and colors (green, red or purple). Savoy cabbage has wrinkled leaves, and is sometimes classed in a different group, Brassica oleracea var. sabuada. Savoy varieties are prized for their flavor as well as their good looks. Varieties recommended for New York include: Early: Jersey Wakefield Heads Up Pacifica Tastie Midseason: Chieftain Savoy Lennox Market Prize Ruby Perfection Savoy Ace Savoy King Late: Huron Excerpt from Cornell University Growing Guide
|
Photo from NatalieMaynor