 Are you new to gardening? Learn everything you need to know about gardening in Arkansas from our Extension Agents Cory Tyler, Brad Runsick, and Cody Stroud.
In episode 2, we’re going to work through how to read your soil test report, talk about different soil amendments, such as lime and fertilizer, and discuss how and when to apply. This series is ongoing. Go here to see the videos completed thus far: Gardening from the Ground Up!
0 Comments
I just want to plant something!!! Hold that thought!!! Baxter County Cooperative Extension Brad Runskick recommends not getting too anxious to start anything that’s frost sensitive until May 1st. Download this handy planting guide to help you determine the best time to put your crops in the ground. https://www.uaex.edu/publications/pdf/MP422_03.2020.pdf 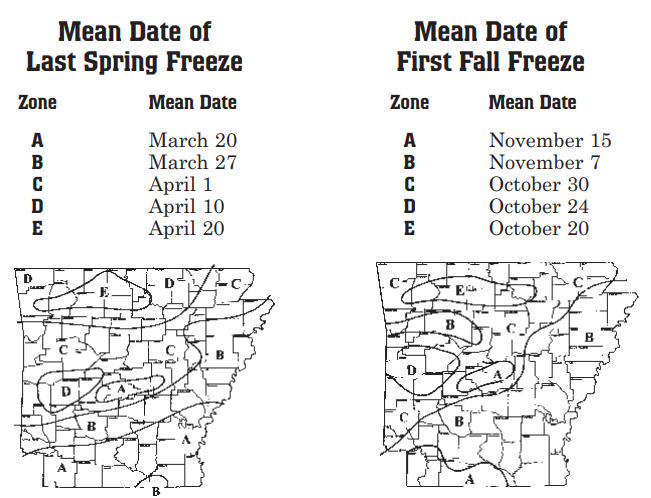 The University of Arkansas Cooperative Extension Services provides many Yard and Garden Resources for Arkansans and gardening. Check out the information for the following interests by clicking on the picture. 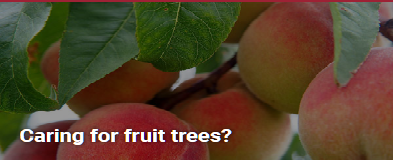   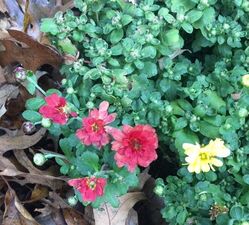 Chrysanthemums, or Chrysanthemum morifolium, are perennial subshrubs of the genus Chrysanthemum in the family Asteraceae. 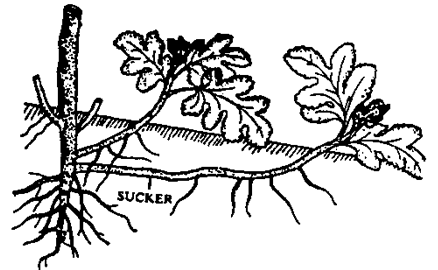 The plant is a perennial IF it has had adequate time to grow suckers, which is where next year's growth begins. Plants purchased during the fall season have been forced to grow and typically do not have time to establish suckers. For more information about mums and other October garden tips, listen to the October
Master Gardener Mondays ZOOM recording and hear Berni Kurz discuss fall gardening tips. Logon to Buddy Messages for the link, enjoy the talk and prepare your gardens for the winter. Also, click on this link for chrysanthemum history and additional mum tips. https://www.uaex.edu/yard-garden/resource-library/plant-week/garden-mum.aspx 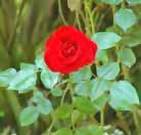 Red Roses: A red rose is an unmistakable expression of love. Red roses convey deep emotions - be it love, longing or desire. Red Roses can also be used to convey respect, admiration or devotion. A deep red rose can be used to convey heartfelt regret and sorrow. The number of red roses has special romantic meanings associated with them. 12 red roses is the most popular of all which conveys "Be mine" and "I love you" 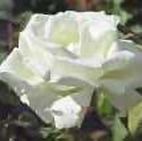 White Roses: White is the color of purity, chastity and innocence. White flowers are generally associated with new beginnings and make an ideal accompaniment to a first-time bride walking down the aisle. White flowers can be used to convey sympathy or humility. They also are indicative of spirituality. Hence, white roses also follow suit.  Pink Roses: There are a lot of variations of the pink rose. Over all, pink roses are used to convey gentle emotions such as admiration, joy and gratitude. Light pink rose blooms are indicative of sweetness and innocence. Deep pink rose blooms convey deep gratitude and appreciation. Pink roses also connote elegance and grace.  Yellow Roses: Yellow roses are an expression of exuberance. Yellow roses evoke sunny feelings of joy, warmth and welcome. They are symbols of friendship and caring. The yellow rose, like the other roses, does not carry an undertone of romance. It indicates purely platonic emotions. 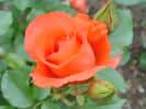 Orange Roses: While a yellow rose reminds us of the sun, an orange rose reminds us of a fiery blaze. These fiery blooms signify passion and energy. Orange roses can be used to express intense desire, pride and fervor. They also convey a sense of fascination. These flowers rival only the red roses as messengers of passion in romance.  Blue Roses: A perfectly blue rose is still elusive like the perfectly black rose. Blue roses cannot be achieved naturally so they represent the unattainable or the mysterious. Blue roses therefore embody the desire for the unattainable. They say "I can't have you but I can't stop thinking about you"  Green roses: Green is the color of harmony, of opulence, of fertility. It is also a color indicative of peace and tranquility. Green roses (these are off-white roses with shades of green) can symbolize best wishes for a prosperous new life or wishes for recovery of good health  Black Roses: Black is the color of death and farewell. A black rose, like the blue rose remains elusive. What we know as black roses are actually really dark red roses. Black roses convey the death of a feeling or idea. Sending black roses to someone indicates the death of the relationship. 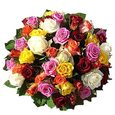 Mixed Roses: By mixing rose blooms of different colors purposefully, you can create a bouquet of emotions. For example, a bouquet of red and white roses would mean I love you intensely and my intentions are honorable. A random mix of roses would convey mixed feelings or send a message: "I don't know what my feelings are yet but I sure do like you enough to send you roses." From: theflowerexpert.com
Soon the weather will be cold and working in the garden will end for the season, here are a few great garden books to read this winter. Some of them are available at our library so check them out.
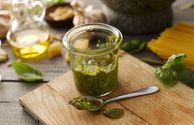 Fresh herbs add pizzazz to any meal. You can use your garden-fresh herbs all year with one of these easy techniques. FREEZING Freezing preserves essential oils that give herbs their flavor. Freezing herbs is easy. There's no need to blanch them; just rinse, remove the leaves from the stems and let them dry on a flat tray. You can put a bunch of these leaves together in a bag to freeze them. You'll end up with a clump of herbs that you can cut up and add to sauces, soups, ect. You can also freeze the leaves individually first on a flat tray (like a cookie sheet) and then place them in a plastic bag; when you open the bag later you can pick out as many individual leaves as you like. Another great method is to blend the herbs with oil to make a paste, which you then freeze in a plastic container, bag or in ice cube trays. You can freeze just one type of herb, such a basil, or make your own blend, such as oregano, thyme, parsley and sage. DRYING Some herbs, such as oregano, sage and thyme, can be air dried. Just hang small bunches in a well ventilated room, away from light. When leaves are dry, remove them from their stems and store in an airtight jar. Unless you live in a very arid climate, herbs such as basil or parsley, which have thick succulent leaves, are better dried in a dehydrator. Once dry store them in an airtight container. Whatever method you choose, be sure to harvest herbs after the flower buds appear
but before they open. That way, you'll be sure to get the highest concentration of essential oils. Early morning is the best time to pick your herbs, after the morning dew has evaporated but before the sun gets too hot. By: Kathy LaLiberte 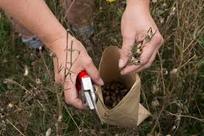 The health of your soil -- including its composition, its nutrients and its ability to hold water -- is all essential to the lives it supports. If your garden or lawn isn't looking so great, maybe it's time to see how your soil is doing. Soil testing can be done in the fall or in the spring before the lawn greens up. The University of Arkansas Cooperative Extension Service offers homeowners free soil testing. Soil testing isn't complicated and the soil samples you dig up can be taken to your local county extension office for testing. How to Gather Your Soil Sample Sample areas around shrubs separately from turf. If you have a large lawn or garden, sample areas separately that have been managed differently or will be managed differently. Use the following procedure in collecting your soil sample:
1. Rake aside mulch or surface litter like leaves. 2. Take soil with a soil probe or shovel from at least 12 spots in each area to obtain a representative sample. A zigzag sampling pattern is preferred. Fertilizer and lime recommendations are no better than the sample taken. 3. Take samples in gardens, lawns, and around shrubs to a depth of about 4 inches and for mature fruit trees at a depth of 12 inches. 4. Mix soil thoroughly from a sample area. Keep different areas separate. Discard rocks, gravels and roots. 5. Allow the soil sample to air dry. Spread the sample on newspapers or large paper bags for a couple of days. Do not heat the sample in an oven to speed drying. 6. Remove one pint for the laboratory sample and place in a clean container or zip top bag. Label each sample with a name that you would recognize. 7. Bring sample(s) to your local County Extension office. Office hours are 8:00am to 4:30pm Monday through Friday. For Arkansas Taxpayers, there is no fee for us to process and run your samples. Out of State samples will be charged $10.00 per sample. 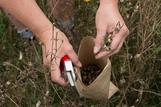 Collecting flower seeds from your favorite plants is a fun and rewarding pastime. Growing plants from seed is not only easy but also economical. Once you have the method down you will have a cost efficient way of ensuring a garden full of beautiful blooms year after year. Seed harvesting provides an opportunity to preserve your beautiful garden flowers to replant next year or share with friends and family. Some gardeners also enjoy developing their own seed strains or hybridizing their plants by seed saving. Knowing when to harvest garden seeds is the first step to saving plants for future use. Once flowers begin to fade at the close of the season, most flower seeds are ripe for picking. Seed harvesting should be done on a dry and sunny day. Once seedpods have changed from green to brown and can be easily split, you can begin collecting flower seeds. Many people choose to gather seeds while deadheading plants in the garden. Always harvest seeds from your best performing plants. When you’re ready for seed harvesting, you’ll need to know the best method on how to collect flower seeds. Use clean and sharp garden scissors to cut the pods or seed heads from the plant and place them into a paper collection bag. Label all of your bags so that you do not forget which seeds are which. It is important to use only paper bags, as seeds can spoil in plastic. Once you have collected your seeds, you can spread them out on a screen or a piece of newspaper and dry them at room temperature for a week. So now that your seeds have been harvested, it’s time to learn how to store flower seeds to ensure they will be at their optimal best for planting next season. Brown paper bags or envelopes are great to store dry seeds. Label all envelopes accordingly. Store seeds in a cool and dark spot for the winter. A temperature around 40 F. (5 C.) is best. Do not crush or damage seeds or allow seeds to freeze or overheat while in storage. Keep seeds dry at all times. By Susan Patterson, Master Gardener
Gardening Know How 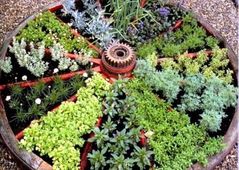 In a botanical sense, an herb is a plant that does not produce a woody stem and dies back to the ground each winter to a perennial root system. In the garden sense, herbs are plants that serve as a major source of seasonings in food preparation. In an even broader sense, herbs include plants that are also useful for scents in cosmetics or for medicinal purposes. Some of them are woody and out step the definition of a herbaceous plant. For American pioneers, herbs were the major source of seasonings for foods. They were also used for curing illnesses, storing with linens, strewing on floors, covering the bad taste of meats before refrigeration was devised, dyeing homespun fabrics, and as fragrances.
With the advent of the supermarket, growing herbs in the garden declined because a wide range of dried herbs became available in stores. Now, however, with an increase in the popularity of ethnic foods, combined with a realization that fresh herbs have more distinctive tastes than some dried herbs, more gardeners are growing at least a few herbs for fresh use, drying or freezing. Increasing interest in herbal medicine also has helped make herb growing more popular. In addition, some herbs are ornamental. General Culture Most herbs are easy to grow, but you must select the proper location to grow them. Most herbs need a sunny location, and only a few, including angelica, woodruff and sweet cicely, are better grown in partial shade. The oils, which account for the herbs' flavor, are produced in the greatest quantity when plants receive six to eight hours of full sunlight each day. If you don't have a good, sunny location, many herbs will tolerate light shade, but their growth and quality will not be as good. Soil Herbs will grow in any good garden soil. The soil should not be extremely acid or alkaline; a soil nearly neutral is best for most herbs. A pH between 6.5 and 7.0 produces the best herbs. Herbs grow best when soils have adequate organic matter. Most herbs do not require highly fertile soil. Highly fertile soils tend to produce excessive foliage that is poor in flavor. In preparing average soils, incorporate 4 inches of peat moss or compost into the garden area to improve soil condition and help retain moisture. Drainage When selecting a site for an herb garden, you must consider drainage. None of the important herbs grow in wet soils, but a few, such as mint, angelica and lovage, thrive in fairly moist soils. If the only area available is poorly drained, you need to modify the area. Build raised beds or install underground drainage tiles to grow herbs successfully. Preparation Once you select a site, cultivate the soil to a depth of 12 to 18 inches, then level it. If only a shallow layer of topsoil exists above hard subsoil, remove the topsoil temporarily. Break up the subsoil, adding organic matter. After improving the subsoil, put it back. Even though the topsoil may be better than the subsoil, the topsoil may also need additional organic matter. Pests Few insects or diseases attack herbs. In some localities, rusts infect mints. In hot, dry weather, spider mites damage some herbs. Aphids attack anise, caraway, dill and fennel. Grasshoppers and certain caterpillars attack herbs when conditions are right. Control is usually not necessary until you notice a problem. If control is warranted and pesticides are used, make certain they are labeled for food crops if the herbs are to be used for culinary purposes. Propagation From Seeds You can grow many herbs from seeds. If possible, sow the seeds in pots or flats indoors in late winter. They need a sunny window and cool temperatures (60 degrees F) for best growth. Treat young plants for the garden just as you would treat young salvia or pepper plants. Because some plants take longer than others to develop, start those with smaller seeds first, preferably in February. You may later transplant them into individual pots and plant them in the garden after danger of frost is past. The finer the seeds, the shallower you should sow them. A few herbs do not transplant well. Sow them directly into the garden. Plant anise, coriander, dill and fennel directly in the garden and don't transplant them. For direct seeding outdoors, plant in spring after all danger of frost is past and the soil is beginning to warm up. Make the soil into a fine, level seed bed. As a general rule, sow seeds at a depth of twice their diameter. Propagation From Cutting, Division and Layering Some established herbs multiply asexually by cutting, division or layering. Layering is suitable for many perennials with flexible branches. Division works well for tarragon, chives and mint. Lavender, lemon balm, scented geraniums, sage and rosemary can be propagated from cuttings. You can take cuttings of herbs any time during late spring and summer from healthy, well-established plants. Cuttings taken in fall take longer to root. Healthy tip growth makes the best cuttings. Cuttings of vigorous soft shoots or old woody stems are less desirable. Cut just below a node to form a cutting that is 3 to 5 inches long. Most herbs should root in two to four weeks. After rooting, overwinter them indoors in pots in a sunny window or in a cold frame. Plant them outdoors in a permanent location the following spring. Division is useful for multiplying healthy, established plants that may be two to four years old. Division allows modest increase for plant like chives, mints and French tarragon. Divide herbs in early spring before growth begins. Dig up the old plant and cut or pull it apart into sections. Replant the sections and keep them moist until the new plants are established. Layering is the simplest and most reliable method to increase perennial herbs such as thyme, lemon balm, winter savory, sage, bay and rosemary. The basic principle is to produce roots on a stem while it is still attached to the parent plant. After you root the stem, detach the new plant from the parent. Select a healthy branch that is growing close to the ground and that is flexible enough to bend down to the soil. While holding the branch close to the soil, bend the top 6 to 10 inches of the stem into a vertical position. It may be helpful to scrape the bark on the underside of the branch at the bend. Bury the bent, scraped portion 3 to 6 inches deep, and anchor it with a wire loop. Insert a small stake to hold the top upright. Water thoroughly. You can layer anytime from spring to late summer. Allow the rooted shoot to remain in place until the following spring. Then cut it from the parent plant and plant it into the desired location. Winter Protection Many herbs suffer winter damage in our climate, so some winter protection for perennial herbs is advisable. Many herbs have shallow roots that heave out during spring thawing and freezing of soil. A loose mulch spread over the roots about 4 inches deep can provide adequate protection. Evergreen boughs, straw or oak leaves are good materials for a mulch. Don't mulch until after the ground is frozen in early winter. Do not remove mulch until you see signs of new growth in the early spring. If the mulch compacts during the winter from heavy snows, fluff it up in early spring before growth begins. Harvesting Herbs Depending on the herb, harvest may include one or more plant parts. In most cases you harvest the leaves, but in some cases you pick flowers, seeds or roots. Handle blossoms just as you would handle leaves. Often, you harvest blossoms with the leaves and mix them together. Dried herbs lose quality in two to three years. Discard them if you haven't used them in that time. Leaves To determine the best harvest time for each herb, you need some experience. However, a few general rules can lead you in the right direction for most herbs. Harvest the leaves when they contain the optimum amount of essential oils. These oils give herbs their special flavor or scent. Ideally you should cut herbs soon after the dew has evaporated from the leaves in the morning. Harvest on a dry day that has been preceded by at least two sunny days. In most cases, cut stems for harvest when the flower buds are just beginning to open. Mints, however, have the most oil in the leaves when the spikes are in full bloom. When gathering a large quantity of herbs, use an open-weave basket or containers that allow good air movement. Don't stuff herbs into plastic bags, which can heat up and cause rapid deterioration of herbs. Never cut more stems than you can conveniently dry at one time. You can cut back a perennial herb to about half its height and can cut down an annual to a few inches. You can also remove an annual completely near the end of the season. Wash the plants in cool water immediately after gathering and spread them on towels. Pat them gently with a towel until dry. A dark, well-ventilated room where temperatures run between 70 and 90 degrees F is an excellent room for drying. Air conditioning is helpful, because it reduces humidity in the air. You can use frames covered with cheesecloth or other netting, or metal window screens with cheesecloth laid on top for drying. Prepare the frames or screens before you cut the plants. For some herbs, you strip the leaves from the stems before drying. Herbs in this group include basil, dill, lemon balm, lovage, mint, sage, lemon verbena and tarragon. Spread these leaves in single layers for quickest drying. Herbs with smaller leaves can be dried on the stems. These herbs include thyme, summer and winter savory, rosemary, oregano and marjoram. Strip the leaves after drying is complete. Herb leaves should dry in three to four days under proper conditions. In humid weather, you may need to spread the herbs on a cookie sheet and dry them in an oven at about 125 degrees F for a few minutes before placing them in an airtight container. Some herbs do not dry well at home. Instead, you can freeze them. Handle them as you would for drying. Then after washing, blanch them in boiling, unsalted water for 50 seconds, cool quickly in ice water and blot dry. Spread them in a single layer on paper or cookie sheets and place them in the freezer. You can freeze dill, chives and basil without blanching. After the herbs are frozen, place them in airtight plastic containers or bags. Roots Angelica and lovage produce usable roots. Dig these roots in the late fall or early spring. Wash them thoroughly after digging. Then slice or split the large roots. Place the pieces in thin layers on screens and turn the slices several times a week. After they are partially dry, finish them in an oven at low heat before placing them in an airtight container for storage. It may take roots six to eight weeks to dry completely. When dry, the root piece should snap when you bend it. Seeds You can grow and process seeds of dill, caraway, fennel and anise at home. When the plants begin to mature and yellow, cut the heads of the plants containing the seeds, leaving a short stem. Place them on a drying tray for five or six days. Then the seeds should fall fairly easily from the heads. Remove the chaff, and allow the seeds to continue to dry for another week. Stir them frequently. Store seeds in airtight jars after complete drying. Source: University of Missouri Extension Web site http://extension.missouri.edu/p/g6470 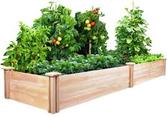 Productive vegetable gardens are based on a strong foundation, and that foundation is the soil. Healthy soil consists of different non living mineral particles such as sand, silt and clay, as well as organic matter and living organisms. Healthy soils provide an environment conductive to root growth which leads to a healthy plant and fruit and and vegetable production. First, start with a soil test in order to know what nutrients are needed as well as the pH and organic content of the soil. Refer to the Smart Gardening tip sheet “Don’t Guess - Soil Test!” for details on how to do a soil test. Once you have the results, you will know what amendments and in what proportion to add for best results in the vegetable garden. Only add the recommended amounts of fertilizer based on the soil test results. Over application of phosphorous and nitrogen fertilizers is a known contaminant of surface and ground water. A collaboration with Organic matter is also a very important component of your soil as it is the “glue” holding all of the soil components together, providing space for oxygen and good drainage. Organic matter includes composted animal manure, chopped up leaves, grass clippings and cover crops. These are added to sandy soils in order to improve water-holding capacity, and added to clay soils to improve drainage. Site preparation If you are breaking ground for a new garden, eliminate grass or weeds that might be in the planned garden area first. One method is to remove the grass or sod by hand. This is most feasible when an instant result is needed. The sod chunks or grass removed can be added to a compost pile and re-entered to the garden system at a later time. However, this method will also require some organic matter be added to the soil below the old turf roots. If you are breaking ground for a new garden, eliminate grass or weeds that might be in the planned garden area first. One method is to remove the grass or sod by hand. This is most feasible when an instant result is needed. The sod chunks or grass removed can be added to a compost pile and re-entered to the garden system at a later time. However, this method will also require some organic matter be added to the soil below the old turf roots. There are several methods that employ a “smothering” technique that will accomplish this task without using chemicals. Laying down a sheet of plastic and securing it with weights around the edges will effectively kill vegetation beneath except for the most stubborn of perennial weeds. Another easy way to smother weeds is to place several sheets of newspaper down in the is to place several sheets of newspaper down in the area and layer compost or other organic matter such as chopped up leaves, grass clippings or mulch over the top. This is commonly called "sheet composting." The organic layers on top will degrade while weeds below are dying out, resulting in a weed-free space. This may take a few months or can effectively start in the fall with spring planting in mind. Today's newsprint is made with vegetable-based ink so there are no worries about residues left behind. No-till farming and gardening is a method in which the soil is left undisturbed except in the planting space for the seeds or plants. For years farmers have utilized the no-till method for crops, realizing the benefits of erosion control, soil moisture conservation, fewer weeds and building soil structure and health. Excessive tillage destroys the soil structure which is the foundation for healthy plant roots that interact with the living component of the soil. Adding organic matter also enhances soil structure by encouraging microorganisms to act as a conduit for nutrients to enter plant roots. The no-till technique leaves crop residue on the soil surface which increases the organic matter content of the soil while enhancing the environment for the living component. Many gardeners are utilizing no-till vegetable gardening. Planning a no-till smart vegetable garden requires a little bit of thought. It is imperative that you don’t walk on the soil in the planting areas as you work in the garden. This will only compact the soil. Therefore, you need to design your garden so that you have paths to walk on between the actual planting areas. The beds should be no more than 4 feet wide so that you can reach across the bed to weed or harvest while kneeling in the walkway. In addition, create beds that are shorter in length so that you are not tempted to cut across the bed to get to another one. A good size bed recommendation is around 4 feet wide by 8 feet long. The sheet composting method mentioned above can be used to prepare the bed the first year. After that, organic Straw mulch used in walkways will reduce compaction and retard weed growth. matter such as compost should be added to these beds each season; organic matter breaks down over time and needs to be replenished. One to 2 inches of compost may be all a garden needs for the season. It may take a couple of seasons to build your no-till beds, but once they are established, adding additional organic matter is all that is necessary. Using an organic mulch such as straw or wood landscape mulch will help prevent weeds from growing and can serve double-duty as organic matter; it’s an important component in the no-till garden. You may want to explore other popular types of no-till systems, including sheet composting, lasagna gardening, straw bale gardens and container gardening. If you choose a more conventional method of preparing the garden such as with a cultivator, you are encouraged to reduce tilling to a minimum. As mentioned before, tilling breaks down soil structure and disturbs the environment that is beneficial to living organisms, so the less tilling, the better. The practice of rotating crops in the garden is also a smart tip. This action helps reduce pests and pathogens that may be carried on the same crop from one year to the next. In addition, crops such as beans and other legumes “fix” nitrogen on their roots which will benefit the next plant that gets planted in that space the following season. By: Pamela J. Bennett and Denise Johnson
Ohio State University Extension 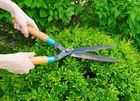 Pruning trees and shrubs tends to be an intimidating process for many people, but it doesn’t need to be intimidating at all. Knowing when to prune to trees and shrubs can take some of the guesswork and concern out of this garden chore. Observing a few simple pruning tips will also make the job easier on you and your plants. In general, it is best to prune plants while they are dormant in the winter. This avoids shocking the plant. If a plant is in desperate need of heavy pruning, it should be done while the plant is dormant. But if a plant just needs a quick trim to maintain a pleasing form, the rules change. Avoid heavy pruning in the spring while a plant’s leaves are expanding. If a little light pruning is necessary at this time, go ahead and prune away, but this isn’t the time for drastic pruning. Dead limbs and branches may be pruned off at any time. If you’re unsure whether or not a branch is truly dead, scratch the bark with a fingernail. A living branch will appear green beneath the bark. If a plant flowers in the spring, it can be pruned immediately after it has finished blooming for the season. Plants that bloom in the early spring set their flower buds in the fall, and winter or early spring pruning of these plants would reduce the amount of spring blooms for them. Shrubs that bloom on new growth in the summer or fall should be pruned in the winter. This will encourage the plant to put out plenty of new growth the following spring, and more new growth means more blossoms to enjoy. Always disinfect your pruning shears before moving from one plant to another to avoid spreading any disease among plants. A quick dip in rubbing alcohol works well as a disinfectant. Source: Free Plants.Com
|
Photo from NatalieMaynor